 On Friday, July 25th, I hosted a workshop for a couple great friends (Lynn and Anne) and it was all about Christmas. We were wanting to get started early on Christmas. We had around 9 people come and I was a little on the nervous side since it was truly my first workshop that I had done. I demonstrated 2 projects (Christmas Card and Gift Tag set and Holder). Here are the 2 make-n-take projects that we did and they were a big hit.
The Christmas card was done using Snowflake Spot. This set is so easy and fun.

Stamp Set: Snowflake Spot and Warm Words
Cardstock: Night of Navy, Baseful Blue, & Whisper White
Inks: Night of Navy and Baseful Blue
Accessories: Dazzling Diamonds & 2-way glue
Directions:
Cut Night of Navy 8 1/2 x 5 1/4, score at 4 1/4, Baseful Blue 4 x 5 1/8, Whisper white 2 1/2 x 2 7/8, Baseful Blue 2 7/8 x 3 1/8, and Night of Navy 3 1/8 x 3 3/8. Stamp medium snowflake in Night of Navy ink on Baseful Blue cardstock. Stamp large snowflake in Night of Navy ink on Whisper White, then mount on Baseful Blue and Night of Navy. Apply 2 way glue to various spots on large snowflake and saying, then sprinkle with dazzling diamonds.
Gift Tag Holder and 3 gift tags
Stamp Set: Snowflake Spot and Think Happy Thoughts
Cardstock: Glorius Green, Real Red, Basic Black, & Whisper White
Inks: Real Red, Basic Black and Glorious Green
Accessories: Scallop punch, 1 3/8 circle punch, 1 1/4 circle punch, handheld circle punch, red grosgrain ribbon, small cellophane bags
Directions:
 Cut glorious green 5 3/4 x 3 1/4, score at 1 1/2. Cut off 1 1/4 of small cellophane bag. Tape to cardstock below fold line. Tags are cut at 4 x 2 and then score at 2. Fold tag and punch out scallop & 1 3/8 circle then mount to scallop. Stamp image on whisper white then punch out with 1 1/4 punch. This makes it very easy to line up the image inside the punch. Please e-mail me if you have any more questions.
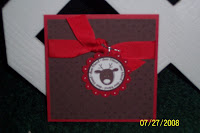
This is a new set called "Deer Friends" that will be in the upcoming Fall/Winter catalog. I cased this card from Angie Juda. She offers a tutorial on this card.
Here are a couple of other samples that I made.


